








 Contact Platform Support
 Help Center
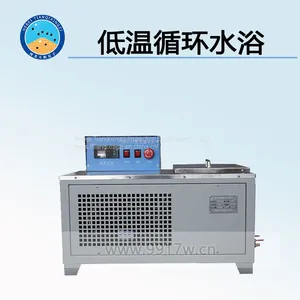
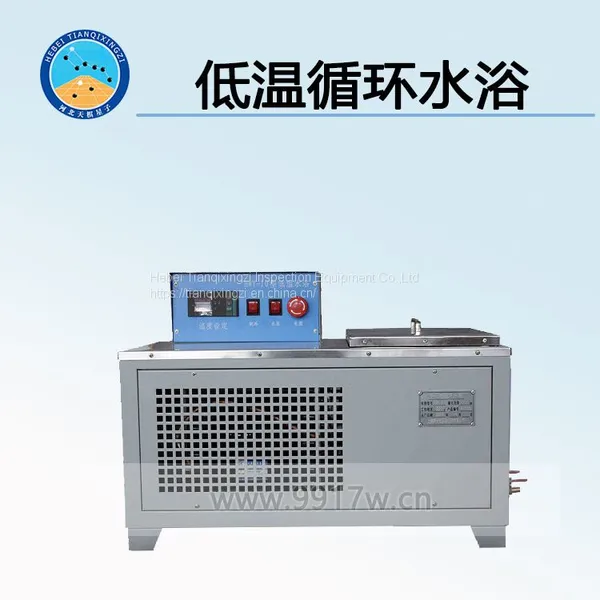
Low Temperature Circulating Water Bath



Related Products
-
 Crack Resistance of Sanitary Ceramics Testing MachineNegotiableMOQ: 1 Piece
 -
Marshall Stability Test Piece Automatic CompactorNegotiableMOQ: 1 Piece
-
Maximum Theoretical Density Meter of Asphalt MixtureNegotiableMOQ: 1 Piece
-
Swing Testing Machine (hereinafter Referred to as Testing Machine)NegotiableMOQ: 1 Piece
-
Digital Display Compressive Strength TesterNegotiableMOQ: 1 Piece
The water bath is suitable for curing asphalt specimens, and can be linked to the accuracy of the test device, temperature control range under the normal temperature conditions used in the instrument, has the advantages of fast cooling speed, low noise and high temperature precision. It is widely used. It is an indispensable equipment for testing and testing units.
Three, technical parameters
1, temperature control table temperature control range: 0 ~ 99.9℃
2, power supply voltage: 220V
3, temperature control accuracy: ±0.1℃
4, water bath size: 310×200×120
5. Heating power: 500W
6, refrigeration power: 140W
7, the equipment temperature control range: 3-60℃
Four, installation instructions
1, the equipment should be placed at room temperature -10℃ to 30℃; The relative humidity should not be higher than 80% indoors. The room should have good ventilation.
2. When unpacking, pay attention not to knock against the box and parts.
3. The power supply of the equipment is recommended to use an air switch with leakage protection, so the equipment does not bring a power plug when leaving the factory.
4. The equipment should be placed on the flat ground, and the four feet at the bottom of the equipment should all touch the ground and exert even force.
5. Schematic diagram of connection with needle penetration:
Five, debugging instructions
1. Add water to the water tank after switching on the power supply to debug the equipment. The water level should not be lower than the grate in the sink. (Note: Do not start the machine without water)
2. After filling with water, please check whether there is water leakage in each part of the equipment. If there is water leakage, please tighten the bolt or inform the company.
3. Power on, press the power button successively => Cooling button => water pump button. At this time the pump stirring device starts. However, the compressor will not start (Note: the compressor has been set with a delay protection device at the factory, which generally takes 3-5 minutes to start)
4, the test temperature is: 25℃, 15℃, 5℃. Firstly, the heating system will run automatically when the temperature reaches 25℃ according to the temperature control meter. The refrigeration system will always operate, and the heating system will compensate for the heat loss caused by the refrigeration system. (The reason why the technology department of our company designs the circuit like this is: firstly, to control the temperature more accurately, and secondly, to protect the compressor and extend the service life of the compressor.) At this time, the temperature of the water in the water bath will continue to drop to about 3 to 5℃ below the setting temperature, and then gradually rise until it reaches the set temperature control temperature and constant temperature. 15℃ and 5℃ test process and so on.
5. Release the water in the water bath after the test, and wipe all parts clean for later use.
6. Product calibration
This product can be used only after qualified inspection and calibration by a unit with national verification qualification. The verification method is as follows:
1. The tester shall have the qualification of verification.
2. Verification conditions shall be carried out under constant temperature of the product.
3, in the inspection should choose 3-5 (or more than) the standard thermometer. Insert standard thermometers into the representative parts of the water bath with olivier (note: do not insert under the olivier)
4, read the temperature value above each standard thermometer and calculate the average.
5, long press the SET key for 5 seconds, release when the temperature display window displays "Pu", click the SET key to enter the LKu interface, change the value of 000 (all internal parameters are locked) to 001 (this value is allowed to modify internal parameters), and then click the SET key to enter the btu interface (temperature modification parameter interface). Then adjust the temperature display temperature according to the average value of the standard thermometer. If the average value of the standard thermometer is higher than the display temperature of the temperature control meter, 1.5 degrees should be subtracted from the original value of the "SC" interface, otherwise 1.5 degrees will be added. Accurate to 0.1℃.
6. Long press the SET key to return after setting. Observe whether the temperature displayed by the temperature control meter is consistent with the average value of the standard thermometer. If there is any error, continue to adjust it according to the above operation process until it is consistent.
Seven, the operation steps
1. Arrange the prefabricated samples neatly on the supporting plate inside the studio, fill the working room with water, so that the water will soak the test piece and be about 30mm higher than the test piece. Then turn on the power supply to turn on the switch of refrigeration and water pump.
2. Set the required temperature on the temperature control instrument. The setting method is as follows: press the SET key and then release it. The digital tube at the setting display part will flash. Click the adjustment key on the right to adjust. After adjustment, press the SET key to return. The temperature control meter will enter the automatic control program.
3. When the temperature reaches the required control temperature of the temperature controller, the temperature controller will be automatically constant temperature. At this time, the red light is on and the water tank temperature is stable at this temperature. At this time, record the time.
4, the specimen in the water tank temperature constant for at least 30 minutes before the test.
5. After the test, turn the hot water valve at the bottom of the tank to drain the water in the tank, wipe the surface of the instrument and place the instrument in a dry and ventilated place.
Eight, matters needing attention
1. This product has good grounding when it is used.
2. The distance between the back cover of the water bath and the wall should not be less than 50cm.
3. Drinking water with few minerals should be added to the water tank to avoid scale formation in the water tank and circulating pipe fittings.
4. The voltage should be strictly controlled at 220V±20V.
5. Do not switch on or off the compressor during use. Turn off the water pump, refrigeration, and power switches after use.
6. Discharge the water in the water bath after use, and wipe all parts clean for later use.
7. Compressor is easy to break down when it is not in use for a long time, so this equipment should be tested once a month to prevent compressor damage.

Send Inquiry to This Supplier


You May Also Like
-
Digital Display Engineering Ceramic Compression Resistance Strength Testing Machine (also Known as Digital Display Porous Ceramic Compressive Strength Testing Machine)NegotiableMOQ: 1 Piece
-
Cement Constant Stress Pressure Testing MachineNegotiableMOQ: 1 Piece
-
Veneer Brick Bond Strength Tester Adhesive Strength Tester for Finishing BrickNegotiableMOQ: 1 Piece
-
TDYE-300D1 Cement Constant Stress Pressure Testing MachineNegotiableMOQ: 1 Piece
-
TD26730-CXZ Sanitary Ceramic Washing Test Device Flush Test ApparatusNegotiableMOQ: 1 Piece
-
TD37798-FHY Ceramic Tile Slope Metho Anti-slip Coefficient Measurement DeviceNegotiableMOQ: 1 Piece
-
HYE-2000 Micro-electro-hydraulic Micro-electro-hydraulic Testing MachineNegotiableMOQ: 1 Piece
-
Manhole Cover Pressure Testing Machine, Microcomputer Control Manhole Cover Pressure Testing Machine, Multi-type Manhole Cover Pressure Testing MachineNegotiableMOQ: 1 Piece
-
Soil Non-kernel Density Meter Soil Densitometer Without Kernel Non-nuclear Density GaugeNegotiableMOQ: 1 Piece
-
TD118 - 1type Manual Liquid Plastic Limit Combined TesterNegotiableMOQ: 1 Piece


