

Automatic Meter Reading Monitoring Software System OCR Cloud Platform Energy Management System


Related Products
-
 4K Wireless IO Switching Signal Control Timed Signal Triggered Capture Camera Camera With FTP for Construction ProgressUS$ 149MOQ: 1 Piece
 -
Low-Power Battery Wireless Infrared Meter Reader (GPRS/4G/NB-IoT) - for Electricity/Gas MetersUS$ 149MOQ: 1 Piece
-
Solar-Powered Wireless Data Logger, 4G Remote Monitoring for Sensors Temperature Humidity Wind Speed PHUS$ 99MOQ: 1 Piece
-
Protocol Converter for Data Collection and Analysis of Photovoltaic Inverters RS485/PLC/Bluetooth, Rail-MountedUS$ 45MOQ: 1 Piece
-
Wireless Clamp-on Ultrasonic Flow Meter Heat Meter With Remote Monitoring 4G WiFi Lora DN15-DN6000US$ 259MOQ: 1 Piece
| 1 New identification instrument Switch to the data source configuration interface and follow the arrow direction process Enter the data source name->
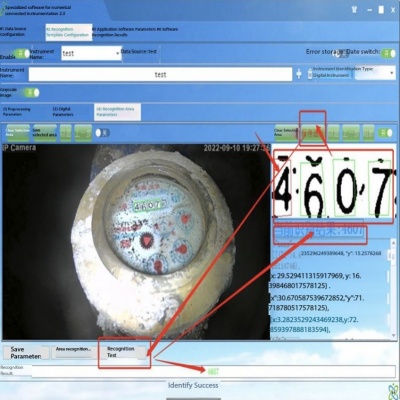
Switch to identify template configuration interface, according to the figure below
(1) Select the area recognition picture
(2) The picture shows the following figure. Note to open the area box switch first (the left side is the area to be identified in the instrument, and the right side is the specific digital area in the area)
(3) Box to identify the area (the mouse left click point, the software will automatically become a line, elected to the fourth point, you can click the right mouse button closed selection, if there is an error can click the last step back a point, or click clear selection button, box area) when click the save selection button, the software will automatically intercept the area (note will use the default preprocessing parameters (then can switch to the preprocessing parameters interface adjustment to identify again).
(4) After clicking the save area on the left, the area selected by the box will be displayed on the right side. If the zoom, you can click the refresh button or click the area recognition button to identify it again.
(5) Follow the arrow instructions. Note that the single data selected in the box can contain the complete digital area as far as possible, otherwise it may be inaccurate, and the template will take effect after the configuration.
(6) To identify the adjustment of pre-processing parameters, you can mainly modify the parameters indicated by the arrow in the figure. Specific prompt information (hover the mouse on the input box)
(7) Digital parameter configuration, pay attention to the selection of SVM mode, the mode recognition rate is the highest, if there is no need for the last bit can be identified without the box, the unit can be set to 10
This function is only for 64-bit programs, which can improve the recognition rate by constantly improving the digital recognition library and retraining. This function can effectively improve the accuracy when the instrument data area is not clear. Identification template directory is as follows (wocrdata \ font):
You can manually put the picture into the corresponding digital directory, and restart the software to take effect (or use the area identification function of the software to identify once) The process of perfecting ocr template is as follows: (1) Confirm that the value of the isDebug configuration item in the profile DialRecognCfg.ini is 2, as shown below: isDebug Description: At 0: No identification intermediate file will be generated At 1:00: Create the recognition result image of each image and save it to the digital directory. (note that the software itself will not delete the modified directory, and you need to delete it manually by yourself.) Save the generated character recognition image to the regcon _ temp directory (note that the software itself will not delete and change the directory, and you need to delete it manually by yourself) For 2: save the generated character recognition image to the regcon _ temp directory (note that the software itself will not delete and change the directory, so you need to manually delete it by yourself) (2)
(3) View the regcon _ temp directory and manually sort out the misidentified pictures. The directory is as follows:
View the 0~9 directory one by one, compare whether the picture is consistent with the value of the corresponding directory, take the 0 directory as an example, the following figure:
Enter the font \ 0 directory, find the picture that is not 0, the arrow direction in the above is 6 and 8, copy the image for 6 to the wocrdata \ font \ 6 directory; copy the picture for 8 to the wocrdata \ font \ 8 directory, go through the 0-9 directory and repeat the above operation to improve the ocr template. (4) When all the pictures are processed, you can delete the regcon _ temp directory and restart the software Software exit (right mouse click taskbar icon-> exit, as shown below)
(1) Open Google browser, enter the ip address of the camera in the browser, and enter the account password of the camera in the pop-up interface. The default account is: admin, the default password: admin (or admin123), as shown below:
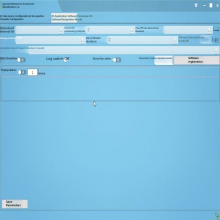
(2) Select the parameter settings-> Advanced settings, as shown below:
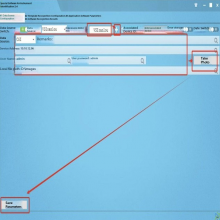
(3) Configure the picture saving parameters, click the fill by the arrow below, and finally click the application button to save the configuration
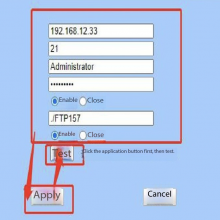
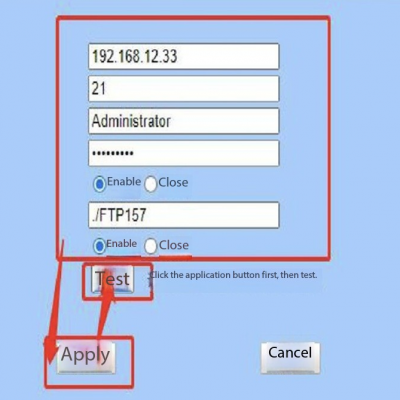
(4) Click the FTP setting button in the figure above, to enter the FTP configuration interface. Server: 192.168.12.33, port: 21, user name: Administrator, Password: ABCabc123 Configure the process as shown in the arrow below:
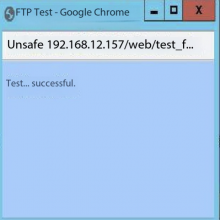
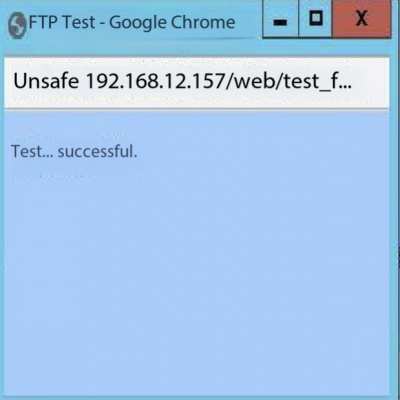
Finally, click test, and if the configuration is correct, the following prompt will be displayed:
|

Send Inquiry to This Supplier

You May Also Like
-
ModBus RTU Infrared Electric Meter Reader Converts DLT645/698 to ModBus Protocol, 38kHz, RS485US$ 145MOQ: 1 Piece
-
High-Precision Power Quality Analyzer - Measures Harmonics, Voltage Fluctuation, Three-Phase UnbalanceUS$ 215MOQ: 1 Piece
-
Low-Power Battery Wireless Current Sensor- Micropower, GPRS/NB-IoT/LoRa, Non-Intrusive AC Current MonitorUS$ 119MOQ: 1 Piece
-
Wireless Temperature and Vibration Sensor With 4G NB WIFI for Predictive Maintenance of Motors & BearingsUS$ 175MOQ: 1 Piece
-
Industrial 4G Wireless PH Sensor Terminal Remote Monitoring Multi-Protocol Support (MQTT/TCP)US$ 115MOQ: 1 Piece
-
Multi-Circuit AC Wireless Voltage & Current Sensor 4G RS 485 Remote Power Monitoring for Smart IoTUS$ 255MOQ: 1 Piece
-
Micropower Wireless Temp & Pressure Sensor With Remote Data Reporting for Pipeline Pressure TemperatureUS$ 140MOQ: 1 Piece
-
Intelligent Measurement Control Device for Transformer for Photovoltaic Wind Power Booster Stations With RemoteUS$ 280MOQ: 1 Piece
-
Industrial Edge Computing Gateway Communication Management Machine With Multi-Protocol Support ( RS485 RS232 Ethernet 4G WiFi )US$ 210MOQ: 1 Piece
-
Ethernet Infrared Meter Reader DLT645 to JSON for Smart Electricity MetersUS$ 115MOQ: 1 Piece


