

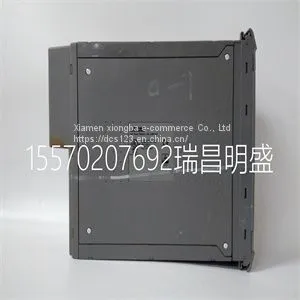
Module Spare Parts T8110C B

Related Products
Focus on DCS, PLC, robot control system and large servo system.
Main products: various modules / cards, controllers, touch screens, servo drivers.
Advantages: supply of imported original products, professional production parts,
Fast delivery, accurate delivery time,
The main brands include ABB Bailey, Ge / fuanc, Foxboro, Invensys Triconex, Bently, A-B Rockwell, Emerson, ovation, Motorola, xyvom, Honeywell, Rexroth, KUKA, Ni, Deif, Yokogawa, Woodward, Ryan, Schneider, Yaskawa, Moog, prosoft and other brands
| T8110C B |
installation and configuration instructions, specification information about the E/M Series DAQ device, and application hints. • Software documentation—You may have both application software and NI-DAQ software documentation. NI application software includes LabVIEW, LabWindows/CVI, and Measurement Studio. After you set up the hardware system, use either your application software documentation or the NI-DAQ documentation to help you write your application. If you have a large, complex system, it is worthwhile to look through the software documentation before you configure the hardware. Chapter 1 About the SCXI-1141/1142/1143 SCXI-1141/1142/1143 User Manual 1-4 • The following help file for software information: – Start»Programs»National Instruments»NI-DAQ» NI-DAQmx Help Installing Application Software, NI-DAQmx, and the DAQ Device Refer to the DAQ Getting Started Guide packaged with the NI-DAQmx software to install your application software, NI-DAQmx driver software, and the E/M Series DAQ device to which you will connect the SCXI-1141/1142/1143. NI-DAQ 8.3 or later is recommended to configure and program the SCXI-1141/1142/1143 module. Note Refer to the Read Me First: Radio-Frequency Interference document before removing equipment covers or connecting or disconnecting any signal wires. Installing the SCXI-1141/1142/1143 into an SCXI Chassis or a PXI/SCXI Combination Chassis Refer to the SCXI Quick Start Guide to install the SCXI-1141/1142/1143 module. Installing the Terminal Block Table 1-1 shows the supported SCXI-1141/1142/1143 terminal blocks. Refer to the SCXI Quick Start Guide and the terminal block installation guide for more information about the terminal block. Table 1-1. Accessories Available for the SCXI-1141/1142/1143 Accessory Description SCXI-1304 Screw terminal block—Mounts on the front of the SCXI-1141/1142/1143 module. It includes AC coupling circuitry and ground referencing through a 100 KΩ bias resistor on each channel. SCXI-1305 BNC terminal block—Mounts on the front of the SCXI-1141/1142/1143 module. It is functionally equivalent to the SCXI-1304 terminal block. Chapter 1 About the SCXI-1141/1142/1143 © National Instruments Corporation 1-5 SCXI-1141/1142/1143 User Manual Verifying the SCXI-1141/1142/1143 Installation in Software Refer to the SCXI Quick Start Guide for information on verifying the SCXI installation. Installing SCXI Chassis and Modules in Software Refer to the SCXI Quick Start Guide for information on installing chassis and modules using NI-DAQmx in software. Troubleshooting the Self-Test Verification If the self-test verification did not verify the chassis configuration, complete the steps in this section to troubleshoot the SCXI configuration. Troubleshooting in NI-DAQmx • If you get a Verify SCXI Chassis message box showing the SCXI chassis model number, Chassis ID: x, and one or more messages stating Slot Number: x Configuration has module: SCXI-XXXX or 1141/1142/1143, hardware in chassis is: Empty, take the following troubleshooting actions: – Make sure the SCXI chassis is powered on. – Make sure all SCXI modules are properly installed in the chassis. Refer to the SCXI Quick Start Guide for proper installation instructions. – Make sure the cable between the SCXI chassis and E/M Series DAQ device is properly connected. – Inspect the cable connectors for bent pins. – Make sure you are using the correct NI cable assembly. – Test the E/M Series DAQ device to verify it is working properly. Refer to the E/M Series DAQ device help file for more information.

Send Inquiry to This Supplier


You May Also Like
-
 Module Spare Parts T9110US$ 1 - 100000MOQ: 1 Piece
 -
Module Spare Parts T9402US$ 1 - 100000MOQ: 1 Piece
-
Module Spare Parts T9432US$ 1 - 100000MOQ: 1 Piece
-
Module Spare Parts T9451US$ 1 - 100000MOQ: 1 Piece
-
Module Spare Parts T9481US$ 1 - 100000MOQ: 1 Piece
-
Module Spare Parts 1336F-BRF50-AA-EN-HASUS$ 1 - 100000MOQ: 1 Piece
-
Module Spare Parts 1336F-BRF50-AA-EN-HAS2US$ 1 - 100000MOQ: 1 Piece
-
Module Spare Parts 1407-CGCMCUS$ 1 - 100000MOQ: 1 Piece
-
Module Spare Parts 1715-OB8DEUS$ 1 - 100000MOQ: 1 Piece
-
Module Spare Parts 1746SC-IN04IUS$ 1 - 100000MOQ: 1 Piece


