

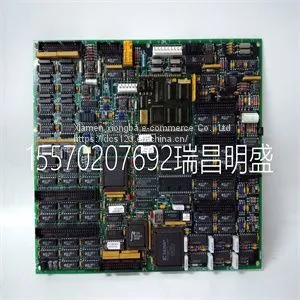
Module Spare Parts DS200TCCAG1BAA

Related Products
-
 Module Spare Parts DS200TCEAG1ACBUS$ 1 - 100000MOQ: 1 Piece
 -
Module Spare Parts DS200TCEAG1BNE DS215TCEAG1BZZ01AUS$ 1 - 100000MOQ: 1 Piece
-
Module Spare Parts DSQC604 3HAC12928-1US$ 1 - 100000MOQ: 1 Piece
-
Module Spare Parts DSQC679 3HAC028357-001US$ 1 - 100000MOQ: 1 Piece
-
Module Spare Parts DT602 GJR2911200R1US$ 1 - 100000MOQ: 1 Piece
Focus on DCS, PLC, robot control system and large servo system.
Main products: various modules / cards, controllers, touch screens, servo drivers.
Advantages: supply of imported original products, professional production parts,
Fast delivery, accurate delivery time,
The main brands include ABB Bailey, Ge / fuanc, Foxboro, Invensys Triconex, Bently, A-B Rockwell, Emerson, ovation, Motorola, xyvom, Honeywell, Rexroth, KUKA, Ni, Deif, Yokogawa, Woodward, Ryan, Schneider, Yaskawa, Moog, prosoft and other brands
| DS200TCCAG1BAA |
Guidelines for Rackmount Installation The installation site must be within reach of the network cabling and meet the requirements listed below: • Appropriate grounded power receptacles must be located within 152 cm (5 ft) of the location. • A temperature of between 0°C (32°F) and 50°C (122°F) must be maintained at the installation site with fluctuations of less than 10°C (18°F) per hour. Attaching the Brackets and Installing in a Rack Proceed as follows to install the switch into a 19‐inch rack: 1. Attach the rackmount brackets to the switch, as shown in Figure 2‐2, using the eight M3x6 mm flathead screws shipped with the switch. Figure 2-2 Attaching the Rackmount Brackets 2. With the mounting brackets attached, position the switch between the vertical frame members of the 19‐inch rack as shown in Figure 2‐3. Then fasten the switch securely to the frame using four customer‐supplied mounting screws. Note: To ensure proper ventilation and prevent overheating, leave a minimum clearance space of 5.1 cm (2.0 in.) at the left and right of the switch. Warning: Before rack-mounting the switch, ensure that the rack can support it without compromising stability. Otherwise, personal injury and/or equipment damage may result. Advertencia: Antes de montar el equipo en el rack, asegurarse que el rack puede soportar su peso sin comprometer su propia estabilidad, de otra forma, daño personal o del equipo puede ocurrir. Warnhinweis: Überzeugen Sie sich vor dem Einbau des Gerätes in das Rack von dessen Stabilität, ansonsten könnten Personenschäden oder Schäden am Gerät die Folge sein. Note: Do not install the rubber feet if you are rack mounting the switch.to a standard 19‐inch rack. Caution: To ensure proper ventilation and prevent overheating, leave a minimum clearance space of 5.1 cm (2.0 in.) at the left and right of the switch. Do not connect the switch to the AC power source until instructed to do so later in the installation process. Precaución: Para asegurar una buena ventilación y evitar que el sistema se sobrecaliente, deje un espacio mínimo de 5.1 cm (2 pulgadas) con respecto a los lados y a la parte posterior del aparato. No conecte el dipositivo a la fuente primaria hasta que no se le indique. 1 Approximately 152 cm (5 ft) from power source 3 44.5 cm (19.4 in.) for proper ventilation 2 4.45 cm (1.75 in.) per switch. (Vertical clearance depends on number of switches stacked.) 4 41.9 cm (16.5 in.) for proper ventilation

Send Inquiry to This Supplier


You May Also Like
-
Module Spare Parts DT680E GJR2923100R1 DT680B-EUS$ 1 - 100000MOQ: 1 Piece
-
Module Spare Parts FC-TSAI-1620MUS$ 1 - 100000MOQ: 1 Piece
-
Module Spare Parts FI820F 3BDH000031R1US$ 1 - 100000MOQ: 1 Piece
-
Module Spare Parts FI830F 3BDH000032R1US$ 1 - 100000MOQ: 1 Piece
-
Module Spare Parts FLN3524AUS$ 1 - 100000MOQ: 1 Piece
-
Module Spare Parts FLN4234AUS$ 1 - 100000MOQ: 1 Piece
-
Module Spare Parts FM265AUS$ 1 - 100000MOQ: 1 Piece
-
Module Spare Parts FM9925a-EUS$ 1 - 100000MOQ: 1 Piece
-
Module Spare Parts FM9925a-E HIEE451116R0001US$ 1 - 100000MOQ: 1 Piece
-
Module Spare Parts G122-824-002US$ 1 - 100000MOQ: 1 Piece


