

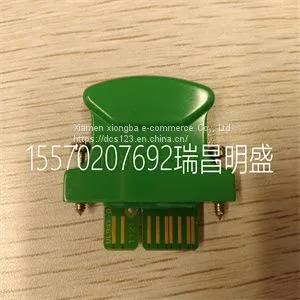
Module Spare Parts D138-002-002

Related Products
-
 Module Spare Parts D20 EME 10BASE-TUS$ 1 - 100000MOQ: 1 Piece
 -
Module Spare Parts D674A906U01 FET3251COP1B4COH2US$ 1 - 100000MOQ: 1 Piece
-
Module Spare Parts D685A1156U01US$ 1 - 100000MOQ: 1 Piece
-
Module Spare Parts DL42N-22US$ 1 - 100000MOQ: 1 Piece
-
Module Spare Parts DS200ADGIH1AAAUS$ 1 - 100000MOQ: 1 Piece
Focus on DCS, PLC, robot control system and large servo system.
Main products: various modules / cards, controllers, touch screens, servo drivers.
Advantages: supply of imported original products, professional production parts,
Fast delivery, accurate delivery time,
The main brands include ABB Bailey, Ge / fuanc, Foxboro, Invensys Triconex, Bently, A-B Rockwell, Emerson, ovation, Motorola, xyvom, Honeywell, Rexroth, KUKA, Ni, Deif, Yokogawa, Woodward, Ryan, Schneider, Yaskawa, Moog, prosoft and other brands
| D138-002-002 |
Maintenance Contents of this chapter This chapter gives instructions on how to do maintenance on the control unit. Replacing the real-time clock battery Replace the real-time clock battery if the BATT OK LED is off when the control unit is powered. For information on the LED, see section LEDs (page 14). For the replacement battery type, see Battery (page 29). See A in figure Replacement illustration (page 23). 1. Remove the screw and the clip covering the battery. 2. Remove the battery. 3. Insert a new battery. Refer to the illustration. 4. Install the screw and the clip. 5. Set the real-time clock. 6. Discard the old battery. Obey local disposal rules and applicable laws. 22 Maintenance Replacing the memory unit WARNING! Do not remove or install the memory unit when the control unit is powered. See B in figure Replacement illustration (page 23). 1. Remove the screw. 2. Pull out the old memory unit. 3. Insert the new memory unit. 4. Install the screw. Replacing the SD/SDHC memory card Do not remove the SD card while the yellow WRITE LED is on. Writing to the SD card is in progress. For the replacement card type, see the technical data. See C in figure Replacement illustration (page 23). 1. Remove the screw and the clip covering the memory card. 2. Push the card to remove it. 3. Install the new card in reverse order. Replacing the control unit See section Installing the control unit (page 17). 1. If the control unit is attached to the rail with screws or end brackets, remove them. 2. Remove the control unit from the rail. 3. Remove the latches from the back of the control unit. 4. Pull out the detachable terminal blocks that have control cables connected. 5. Install the new control unit in reverse order. If there is a safety circuit connected to the STO terminals (XSTO) of the control unit, do the acceptance test of the safety function after replacing the control unit. See the drive or inverter module hardware manual, safety option user’s manual, and/or the related FSO safety functions module user’s manual.

Send Inquiry to This Supplier


You May Also Like
-
Module Spare Parts DS200CTBAG1ADDUS$ 1 - 100000MOQ: 1 Piece
-
Module Spare Parts DS200DCFBG1BGBUS$ 1 - 100000MOQ: 1 Piece
-
Module Spare Parts DS200DCFBG1BJBUS$ 1 - 100000MOQ: 1 Piece
-
Module Spare Parts DS200DCFBG1BKCUS$ 1 - 100000MOQ: 1 Piece
-
Module Spare Parts DS200DCFBG1BLCUS$ 1 - 100000MOQ: 1 Piece
-
Module Spare Parts DS200DCFBG1BNCUS$ 1 - 100000MOQ: 1 Piece
-
Module Spare Parts DS200LDCCH1AGAUS$ 1 - 100000MOQ: 1 Piece
-
Module Spare Parts DS200LDCCH1ANAUS$ 1 - 100000MOQ: 1 Piece
-
Module Spare Parts DS200PCCAG1ABBUS$ 1 - 100000MOQ: 1 Piece
-
Module Spare Parts DS200SDCCG1AFDUS$ 1 - 100000MOQ: 1 Piece


