

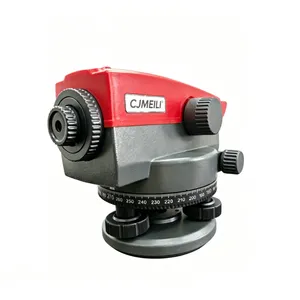
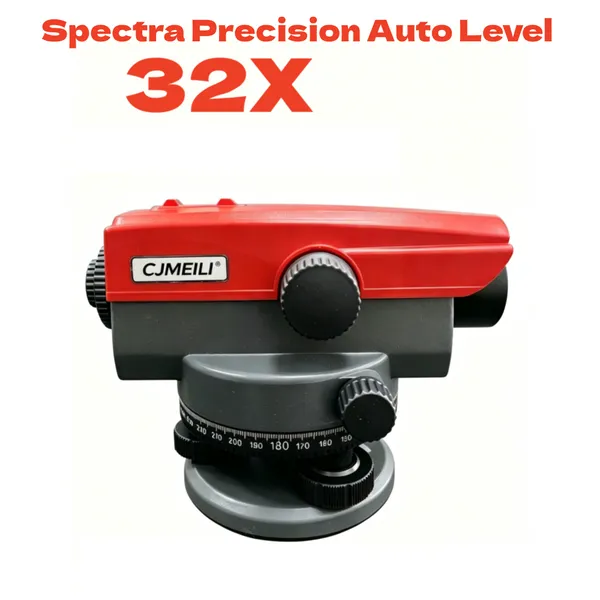
CJMEILI Level Engineering Survey 32 Times Optical Automatic Leveling Outdoor Surveying and Mapping


Product Spotlights
Related Products
-
 Brass 3-Function Shower Faucet Set, Gunmetal Gray Shower System With Rain Shower Head & Handheld Spray, Wall-Mounted Bathroom Shower Mixer TapUS$ 88 - 200MOQ: 1 Box
 -
Bathroom Electric Heated Towel Rack, Towel Warmer for Bathroom, Wall Mounted Stainless Steel,Brushed GoldUS$ 50 - 120MOQ: 1 Combo
-
Bathroom Electric Heated Towel Rack, Towel Warmer for Bathroom, Wall Mounted Stainless Steel,6 ColoursUS$ 50 - 120MOQ: 1 Combo
-
Bathroom Electric Heated Towel Rack, Towel Warmer for Bathroom, Wall Mounted Stainless Steel,4 ColoursUS$ 72 - 160MOQ: 1 Combo
-
Bathroom Electric Heated Towel Rack, Towel Warmer for Bathroom, Wall Mounted Stainless Steel,5 ColoursUS$ 72 - 160MOQ: 1 Combo
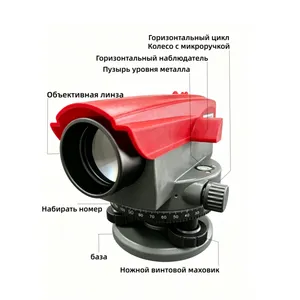
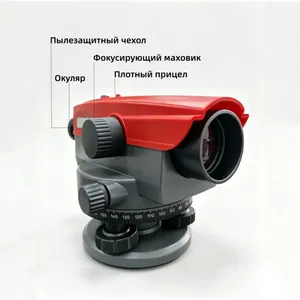
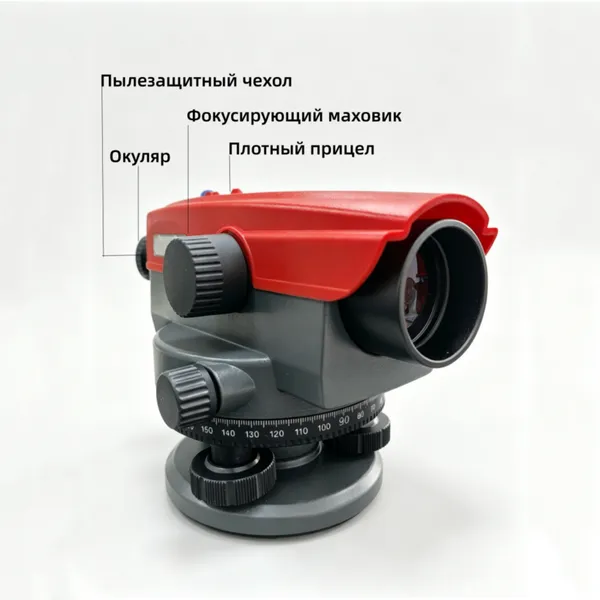
1. Instrument Parts
Familiarize yourself with the key components of your auto level :
1:Focusing Knob – Focuses the image of the grade rod.
2:Sighting Guide – Rough aiming tool to locate the grade rod.
3:Eyepiece – Look through here to see the crosshairs.
4:Crosshair Focusing Ring (Diopter) – Adjusts the focus of the crosshairs.
5:Horizontal Tangent Knob – Fine adjustment for rotating the telescope horizontally.
6:Horizontal Rotation Ring – Marks horizontal angles (0-360°).
7:Leveling Screws – Used to center the circular level bubble.
8:Circular Level (Bubble) – Indicates when the instrument is roughly level.
9:Circular Level Mirror – Allows you to view the bubble while adjusting screws.
10:Objective Lens – Main lens pointing toward the grade rod.
2. Setting Up the Instrument
Step 1: Set Up the Tripod
Extend the tripod legs to a comfortable working height (roughly chin-level).
Place the tripod on stable ground, pressing the feet firmly into the earth.
Ensure the tripod head is as level as possible -2-3.
Step 2: Attach the Auto Level
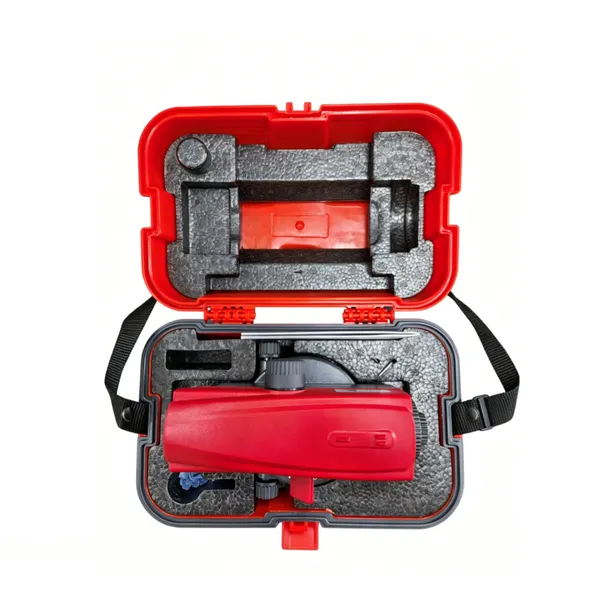
Remove the instrument from its carrying case.
Carefully screw the auto level onto the tripod head using the central mounting screw.
Step 3: Level the Instrument (Circular Level)
Use the leveling screws to center the bubble inside the circular level.
Left-thumb rule: The bubble moves in the same direction as your left thumb -6.
Turn two screws simultaneously in opposite directions to center the bubble roughly, then use the third screw for fine adjustment.
When the bubble is perfectly centered, the compensator will automatically activate to provide a horizontal line of sight -3-4.
Step 4: Focus the Eyepiece (Crosshairs)
Point the telescope at a bright, blank surface (like the sky or a white wall).
Turn the crosshair focusing ring (diopter) until the crosshairs are sharp and black -2-3.
Note: This adjusts for your individual eyesight. Do not change it during a measuring session.
Step 5: Focus on the Grade Rod
Use the sighting guide to roughly point the telescope at the grade rod.
Look through the eyepiece and turn the focusing knob until the grade rod image is sharp and clear -3.
Gently move your eye up/down and left/right in front of the eyepiece. If the crosshairs seem to jump or move relative to the rod, you have parallax. Re-adjust the focusing knob and diopter until there is no movement -3.
3. Taking Measurements
The Spectra Precision auto level allows you to measure elevation differences and distances using the crosshairs.
Measuring Difference in Elevation (Height Difference)
Set up the instrument approximately halfway between two points (Point A and Point B) -3-8.
Hold the grade rod on Point A. Look through the telescope and record the reading at the center horizontal crosshair (e.g., a1 = 1.726 m).
Hold the grade rod on Point B. Record the reading at the center horizontal crosshair (e.g., b1 = 1.259 m).
Calculate the difference:
Difference = a1 – b1
Example: 1.726 m – 1.259 m = 0.467 m
Result: Point B is 0.467 m higher than Point A (positive result means the second point is higher) -3.
Measuring Distances (Stadia Lines)
The telescope has upper and lower stadia lines above and below the center crosshair. These are used to measure horizontal distance -3-8.
Read the value on the grade rod at the upper stadia line (e.g., 1.436 m).
Read the value on the grade rod at the lower stadia line (e.g., 1.152 m).
Calculate the difference:
Difference = Upper reading – Lower reading
Example: 1.436 m – 1.152 m = 0.284 m
Multiply the difference by 100 (the stadia constant) -3-8:
Distance = Difference × 100
Example: 0.284 m × 100 = 28.4 meters
Result: The instrument is 28.4 meters from the grade rod.
Establishing an Elevation
When you know a benchmark (BM) elevation and need to find or mark a new elevation -3-9:
Calculate the Height of Instrument (HI):
HI = Benchmark Elevation + Rod Reading at Benchmark
Example: 30.55 m + 1.72 m = 32.27 m
Calculate the required rod reading for the new point:
Target Rod Reading = HI – Desired Point Elevation
Example: 32.27 m – 31.02 m = 1.25 m
Go to the point you want to establish. Have your assistant move the rod up/down until the center crosshair reads 1.25 m. The bottom of the rod is now at the desired elevation (31.02 m) -3.
4. Key Features & Notes
Automatic Compensator: After you center the circular level, the internal compensator (magnetic or air-dampened) automatically ensures the line of sight is perfectly horizontal. However, the compensator does not fix errors from an improperly adjusted circular level -3-4.
Compensator Check: Many models have a check button. Press it to release the compensator; the line of sight should return exactly to its original position.
Maintenance: Always store the instrument in its carrying case. Clean lenses with a soft, lint-free cloth. Keep the instrument dry and avoid extreme temperatures -3-8.
Shortest Focus Distance: The minimum focusing distance is typically 0.6 meters (1.97 feet) .

Send Inquiry to This Supplier


You May Also Like
-
Bathroom Electric Heated Towel Rack, Towel Warmer for Bathroom, Wall Mounted Stainless Steel,5 ColoursUS$ 72 - 160MOQ: 1 Combo
-
Bathroom Electric Heated Towel Rack, Towel Warmer for Bathroom, Wall Mounted Stainless Steel,5 ColoursUS$ 72 - 160MOQ: 1 Combo
-
Bathroom Electric Heated Towel Rack, Towel Warmer for Bathroom, Wall Mounted Stainless Steel,5 ColoursUS$ 72 - 160MOQ: 1 Combo
-
Bathroom Electric Heated Towel Rack, Towel Warmer for Bathroom, Wall Mounted Stainless Steel,3 ColoursUS$ 72 - 160MOQ: 1 Combo
-
Bathroom Electric Heated Towel Rack, Towel Warmer for Bathroom, Wall Mounted Stainless Steel,3 ColoursUS$ 72 - 160MOQ: 1 Combo
-
Bathroom Electric Heated Towel Rack, Towel Warmer for Bathroom, Wall Mounted Stainless Steel,5 ColoursUS$ 72 - 160MOQ: 1 Combo
-
Bathroom Electric Heated Towel Rack, Towel Warmer for Bathroom, Wall Mounted Stainless Steel,5 ColoursUS$ 72 - 160MOQ: 1 Combo
-
Bathroom Electric Heated Towel Rack, Towel Warmer for Bathroom, Wall Mounted Stainless Steel,5 ColoursUS$ 72 - 160MOQ: 1 Combo
-
Bathroom Electric Heated Towel Rack, Towel Warmer for Bathroom, Wall Mounted Stainless Steel,3 ColoursUS$ 72 - 160MOQ: 1 Combo
-
Bathroom Electric Heated Towel Rack, Towel Warmer for Bathroom, Wall Mounted Stainless Steel,4 ColoursUS$ 72 - 160MOQ: 1 Combo


