

Arduino Controlling a WS2812 LED Strand

Related Products
-
 Addressable Ws2801 Smd5050 Led StripUS$ 11 - 13MOQ: 5 Meters
 -
Waterproof Led Strip for Entertainment PlaceUS$ 20 - 25MOQ: 1 Meter
-
Addressable Rgb Led Strip for Entertainment PlaceUS$ 25 - 27MOQ: 1 Meter
-
Smd5050 Dream Color 32pixels Led StripUS$ 11 - 13MOQ: 5 Meters
-
Super Brightness Smd5050 Flexible Led StripUS$ 9.5 - 10MOQ: 1 Meter
Specifications
Arduino Controlling a WS2812 LED strand1.dc5v
2.non-waterproof or waterproof
3.ws2812
4.60 LED/1m
Arduino Controlling a WS2812 LED strand
Difference between WS2801, WS2811 and WS2812
The WS2801 and WS2811 are LED driver IC’s (Integrated Circuits).
These IC’s can control up to 3 LEDs, typically Red, Green and Blue. Positioned close together, so you as a viewer will see the mixed color result.The WS2801 used to be quite popular but the WS2812/WS2811 appears to be taking over the reigns.
The WS2812 however is a WS2811 placed inside a 5050 LED package.
The 5050 LED is a very common 3 LED (Red, Green, Blue) package, in one 5mm x 5mm case.
A WS2812 is the same package but with an additional WS2811 LED driver IC on board.
In the illustration below you’ll see the difference:
On the left a 5050 RGB LED, on the right a WS2812 which combines a 5050 RGB LED with a WS2811 controller.Note how the layout of the “silver” tracks are almost identical in both images, yet the black (IC) block and the tiny wires are different (right).
5050 RGB LED (left) and WS2812 (right)
Where the WS2801 strips needed 4 wires, the WS2811/WS2812 strips only needs 3 wires. The WS2801 uses a separate clock line, which can be seen as an advantage, whereas the WS2811/WS2812 does not. The WS2811/WS2812 depends on sending data matching a very tight timing. The advantage of the WS2812 though, is that production of these combo’s in strips is easier and therefor cheaper, and each RGB LED takes much less space on strips.
Your selection here depends on what type of microcontroller you’ll be using and which of these are supported by the application or library you intend to use.
DIGITAL RGB LED strips
The cool part of a digital strip is that you address each LED individually, making very cool effects easy. In the illustration below you can see the physical differences between the WS2801 and the WS2811/WS2812 strips.Unlike the analog strips: Most Digital RGB strips operate on 5 Volts!
Note:
1.Not all struos of the same "model",look the same but have typically a very similar layout.
2.strips can be sold as a white or black strip(background strip)
3.Notice the arows indicating Data direction
4.WS2801 has 4 pins,where as the WS2811/ws2812 only has 3pins.
5.There are digital strips that look like WS2801/WS2811/WS2812 strip,that are NOT based on any of these LED drivers.
6.Strips can be had in waterproof(in silicone tube)or for indoor use only.
7.If you want higher waterproof rate such as IP68,please ask for more details before order.
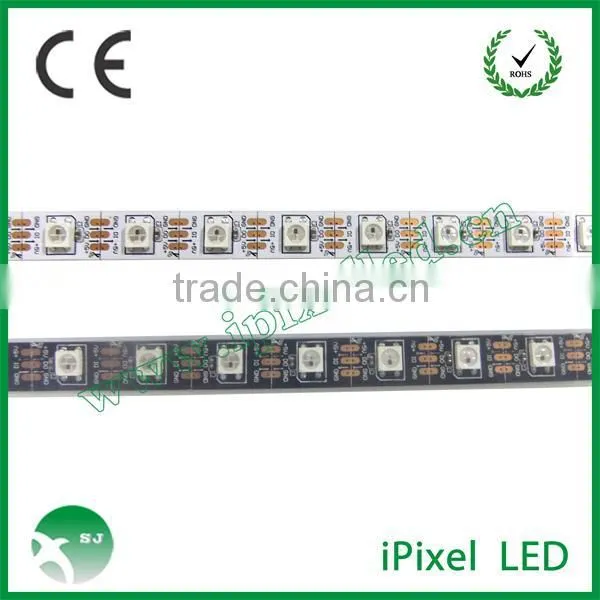
Digital LED strip – WS2812 (top) and WS2801 (bottom)
Making the Arduino WS2812 connection
Now that we have a WS2812 strip, time to hook it up to our Arduino (I used an Arduino UNO for this).
Power Supply
You can use an external power supply for this purpose and even though my 1 meter strip theoretically needs 3.6 A at max brightness, my little 2A power supply managed to handle it – your milage may vary! (1 meter with 60 LEDs/meter = 60 * 60 mA = 3600 mA = 3.6 A max.)
A switching power supply is often ideal and pretty cheap – you might even have one or the other laying around from your old cellphone, just make sure it’s actually giving you 5 – 6V and not weird voltages like 12V or 16V or even more. Verification with a Voltage meter is recommended.
About Amps and such
Like I mentioned before, each LED module takes a max of 60 mA, so you can calculate how many Amps your power source has to provide. Keep in mind that 1000 mA = 1 A.
Your power supply can have overcapacity when it comes to Amps, so if your project needs 3.6 A, and you only have a 10 A power supply, then this will work great.
Keep in mind though that the Voltage must be close to the 5V value. Higher voltages may damage your LEDs.
Connecting Arduino and WS2812 strip
The basic layout of power can be done in 2 ways – with computer or without …
Arduino Connected to your Computer
Commonly, during testing, your Arduino is connected to your computer via a USB cable where the USB cable does not only program the microcontroller but will also provide power for the Arduino. The DIN (data input) pin of the LED strip goes to Arduino PIN 6 with an optional 470Ω resistor in between.+5V of the LED strip goes to the +5V of extra power supply.GND of the LED strip goes to GND of the extra power supply and to the GND of the Arduino.The USB of the Arduino is connected to your computer. Arduino Not connected to your computer
In that case you’d typically have the Arduino in a very different location, and thus not connected to your computer. In that case the extra power supply for the LEDs could be used to feed the Arduino as well.The DIN (data input) pin of the LED strip goes to PIN 6 of the Arduino with an optional 470Ω resistor in between.+5V of the LED strip goes to the +5V of extra power supply and the +5V on your Arduino.GND of the LED strip goes to GND of the extra power supply and to the GND of the Arduino.
Technical details
Dimensions(1PCB) |
10mmx33mm |
Width(Flexi-strip) |
12.5mm |
Reel Length |
5m |
PCB color |
White |
LED density |
30pcs per meter |
LED package color |
white |
LED color |
Red/green/blue |
LED wavelength |
625nm/525nm/470nm |
LED Luminous Intensity |
625mcd/1250mcd/300mcd |
LED viewing angle |
120deg |
LED Forward Current |
20mA/20mA/20mA |
LED forward voltage |
2.0V/3.1V/3.3V |

Send Inquiry to This Supplier

You May Also Like
-
Hot Express 12v Led Flexible StripUS$ 1 - 5MOQ: 1 Roll
-
Led Neon Flex Supplier In China IP 65 Waterprooof Led StripsUS$ 1 - 5MOQ: 1 Meter
-
Flexible LED Light StripsNegotiableMOQ: 1000 Sets
-
LED Strip 60LEDsNegotiableMOQ: 500 Pieces
-
High Output LED Strip/TapeNegotiableMOQ: 1000 Rolls
-
Best Quality Led Aluminum Profile Custom Led Aluminum ProfileUS$ 0.5 - 10MOQ: 100 Pieces
-
Car Trunk StripUS$ 0.2 - 1.5MOQ: 1000 Meters
-
2014 New Low Voltage Full Color SMD5050 LED Strip LightUS$ 10 - 39MOQ: 1000 Meters
-
0603 0402 0805 5050 3528 SMD LED StripNegotiableMOQ: 2147483647 Meters
-
Waterproof IP68 PE Material Kerbstone IP 68 LED CurbstoneUS$ 12 - 15MOQ: 500 Pieces
