

UL CE Approved Magnetic Contact

Related Products
-
 UL/CE/ROHSCE/ Approved Recessed Mounted Magnetic Contact SwitchNegotiableMOQ: 1000 Pieces
 -
Home Security Magnetic Reed Switch Sensor 12vUS$ 0.6 - 1MOQ: 1000 Pieces
-
UL CE Approved Magnetic Door Contact SwitchUS$ 1 - 4MOQ: 100 Pieces
-
Track Mounted Overhead Door ContactUS$ 6 - 10MOQ: 50 Sets
-
UL Steel Metal Magnetic Contact Switch BSD-3014NegotiableMOQ: 500 Pieces
Specifications
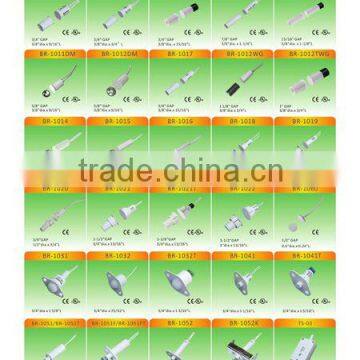
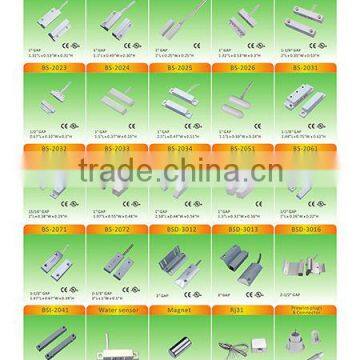
Magnetic Contactrecessed, surface mount and overhead door sizes
Regular, Wide Gap, SPDT, DPDT, and High Security
Magnetic Contact
Alarm contacts allow you to secure the most vulnerable parts of your house -- the doors and windows. By installing hardwired contacts you can make sure that your alarm system keeps an eye on any locations where an intruder might force their way in. Recessed, surface mount and specialty sensors give you the option to choose the exact type of contact you need for your application.
Magnetic contacts are the first line of defense in the burglar alarm industry. They are inexpensive, very reliable, and in most cases out of sight. While PIR's and other interior detectors are an excellent back up, it is the contact that immediately triggers the alarm system when the door or window is open. Contacts should be used on all entry sights because a PIR will pick up the intruder after they are inside.
How do reeds and magnets work and why they work ?
A reed switch is the heart of a magnetic contact. It is nothing more than a simple switch that turns on and off with a magnet.
A reed switch in a closed loop system works on a simple process. When you put the magnet near the reed the two blades inside the glass will close at the same time. When the magnet is withdrawn the reed blades will open causing the circuit to open and the alarm to be triggered. In an open loop the opposite occurs. The reed is open with the magnet near it and closes with the magnet moved away. A supervised system may require a single pole double throw (SPDT) contact. This is a three wire contact, when the magnet is moved away the current, or lack of, will switch to the other pole.
| |
|
Tips for installing :
When installing contacts remember the best gaps come when you mount the reed and magnet in parallel or head to head. You can also align the reed side and magnet in an "L" position. Always avoid putting a magnet and reed in a "T." The reason a "T" position mounting does not work well is because all magnets and reeds have a small neutral spot so if you set it this way and there is any shift in the surface of your installation you are more likely to get a false alarm.
One other point manufacturers request is care. A magnetic contact uses a glass reed switch in the center of the contact. Please make sure holes are not too tight for recess. You are more likely to get a bad contact by pushing a recess into a tight hole than you are by drilling carefully
SENTEK Magnetic Contacts consist of the most common recessed, surface mount and overhead door sizes used in the security industry.

Send Inquiry to This Supplier

You May Also Like
-
Electronic Horn/buzzing Sound(Wechat:13510231336)NegotiableMOQ: 500 Cartons
-
Security AlarmNegotiableMOQ: 2500 Combos
-
Safety With AlarmUS$ 0.65 - 4.5MOQ: 1000 Pieces
-
Anti-theft Alarm Device for Mobile Phone/computer/laptop Display Supplier's ChoiceUS$ 0.1 - 2MOQ: 5 Pieces
-
Wireless Magnetic Door Sensor Contact SDM-100 Wireless Mental Rolling Door Magnetic Contact Wireless Rolling Door SensorUS$ 2 - 3MOQ: 1 Piece
-
Gsm Gprs Rtu 4~20 mA / 0~5 V Gsm Sms Temperature Control AlarmUS$ 60 - 90MOQ: 5 Pieces
-
Metal Type Magnetic Proximity Switch SensorUS$ 4 - 8.1MOQ: 20 Sets
-
Hand Emergency Signalling Apparatus,power Tools,handware Tools,ISO9001,UKASUS$ 239.5 - 254.6MOQ: 1 Piece
-
H0292 LED Key Finder Wireless Key RF Item Locator Remote Control Pet CellUS$ 0.28 - 0.42MOQ: 10000 Pieces
-
Laser Position DetectorNegotiableMOQ: 1 Set


