








 Contact Platform Support
 Help Center
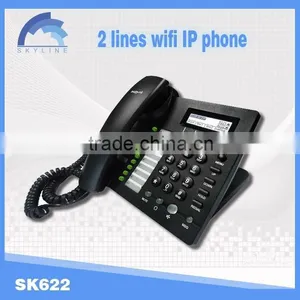
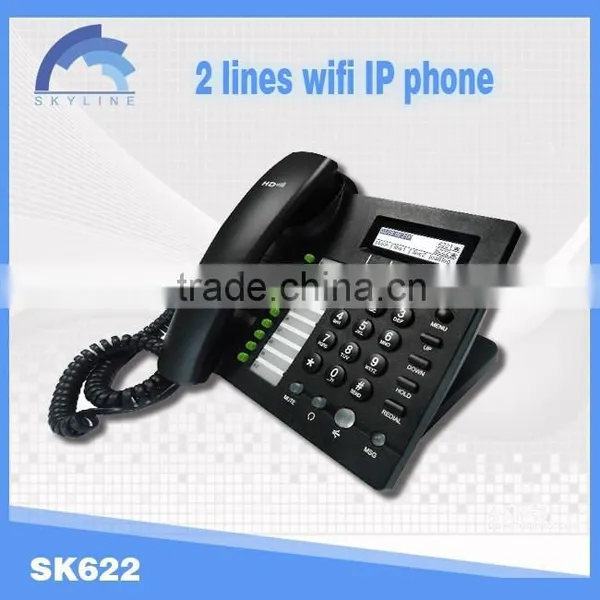
2 Line Wifi ip Phone


Related Products
-
 5 Line Wifi ip PhoneUS$ 112 - 122MOQ: 1 Piece
 -
Hot Offer SK601W Wifi Phone ,Entry Level IP PhoneNegotiableMOQ: 1 Piece
-
Hot Offer SK601P ip Phone /POE,Entry Level IP PhoneNegotiableMOQ: 1 Piece
-
Hot Sale and New Arrive SK652 IP Phone for Advance Business Use With Update FunctionUS$ 33 - 38MOQ: 1 Piece
-
Wholesale/retail IP PBX 5008 Factory With Cheap Rate From ChinaskylineUS$ 1,475.4 - 1,476MOQ: 1 Piece
2 line wifi ip phone
1 Introduction
1.1 Thanks for Purchasing
Thank you for purchasing SK601.The SK601 which has one line is a full-featured VOIP (Voice
over Internet protocol) phone that provides voice communication over IP network.
This phone functions not only much like a traditional phone, allowing to place and receive calls
and enjoy other features that traditional phone has, but also it owns many data services which you
could not expect from traditional telephone.
The SK601 provides Power over Ethernet(PoE) and one Ethernet port for connecting another
device to the local area network.
This guide will help you easily use the various features and services available on your phone.
1.2 Package Contents
Your Package includes the following:
One SK601(withPoE) IP Phone Unit
Handset and handset cord
One universal power adapter
One Ethernet cable
Wall-mounting screw pack
If the above device or accessory is damaged or lost, please contact with your reseller for
replacement.
2 Installing
2.1Assembling the Phone and Connecting to the Network
1) Plug one end of the coiled phone cord into the left of the phone base.
2) Plug the other end of the handset cord into the jack at the button of the handset.
3) If you are using an external power source, push the power cord into the power supply, and plug
the power supply into the phone base unit. Then you will see the LED at the back of the phone
turns red.
Note: Use only the power supply that came with the phone.
4) Plug the Ethernet cable into Internet port in the rear side of the base station. Plug the other end
of the Ethernet cable into your already prepared network connection.
2.2Mounting the Phone to theWall
1) Complete the assembly introductions.
2) Attach two appropriate screws to the wall. Leave 1/4 distance from the wall. This allows you to
slide the mounting brackets on to the screws. Push down slightly to lock the phone in place.
2.3 Turning on the phone
This section assumes that the correct connections have been made.
1) Check whether the Internet port is well connected.
2) Plug the AC power adapter into the electrical outlet.
Note: Use only the adapter that comes with the phone.
3) Then the LED at the back of the phone will turn red, wait about 30 seconds, then the LED turns
green for a little while and turns light red again,hook and you can hear ring tone, that means you
can use the phone normally.
Note: If the LED does not turn on or you can not hear ring tone, re-confirm installation and
connections. If these are incorrect, try unplugging the phone and plugging it back in again. If you
still don’t have the upon features, then contact your Phone Administrator or service provider.
3 Get familiar
3.1 Front Panel
Front Panel NO. Part Name Description
1
Handset top
cradle
For the placement of handset(Receiver
end).
Hook switch For hang-up and hang-off of handset.
Cradle latch
To
prevent the handset from dropping
when it is wall-mounted.
Handset
bottom cradle
For the placement of handset(Transmitter
end)
Handset cord
port
RJ-11 jack on the left side of the IP phone.
Headset wire
port
RJ-11 jack on the bottom of the handset.
Headset
To
mount mouthpiece and earpiece on the
single handle.
2 Multi-Functi
onal Keys
These keys can be used as speed dial and
shortcut keys.
3 Numeric
Keypad
Enters numeric digits for initiating a call
or for entering configuration information.
4 HOLD The hold key is used to hold the current
call, press it again to release the hold
function.
5 XFER The XFER key is used to transfer calls,
including attended transfer and unattended
transfer.
6 CONF The CONF key is used to implement
conference meeting calls.
7 SPEAKER Press it to use handsfree.
3.2 Rear Panel
Rear Panel Part
Name
Description
DND
Switch
The switch is used to turn on or off DND.
Under the character DND is a dot. When
the switch near the dot, DND is on,
otherwise DND is off.
4
LED indicator, details please refer to
3.3LED Introduction.
DC 5V Power port
Internet Connects to the Ethernet switch, router or
Internet.
3.3 LED Introduction
LED
Indicator
Color Status Description
Light red Solid sk 601 is power on and not registered.
Green Solid sk601 is registered and line has no call.
Red Blinking There is a new call incoming.
Red Solid sk601 is registered and line is in active call.
Red Blinking in 10Hz sk601 is firmware upgrading.
2 line wifi ip phone 2 line wifi ip phone

Send Inquiry to This Supplier

You May Also Like
-
Usb GatewayUS$ 13 - 15MOQ: 1000 Pieces
-
The Most Popular Sms Controller GSM RTU Gateway S270 With IOS Android APP 2DIN 2DO 2AIN 1TempUS$ 10 - 10MOQ: 1 Unit
-
GSM Gprs 32 Sim Card Moblie Recharge Bulk Sms Activate Sim Card Modem PoolUS$ 480 - 1,100MOQ: 1 Piece
-
USB VOIP PHONE(USB2.0MiNI TV STICK)NegotiableMOQ: 1 Piece
-
Corded P/T Trimline Phone,wall Mounted Trimline PhoneUS$ 2.15 - 2.35MOQ: 5000 Pieces
-
SIP Phone ip Phone Voip Pixel Color Screen Supporting 4 SIP Lines Providing an Efficient and High-quality Business Communication ExperienceUS$ 30 - 35MOQ: 1 Unit
-
10.1 Inch VoIP Video Android Phone With Android System for Video Conference APP SDKUS$ 400 - 700MOQ: 1 Piece
-
Android VoIP Phone Support 6 SIP Camera Video ConferenceUS$ 145 - 165MOQ: 1000 Pieces
-
Ejoin 16 Ports 64 SIMs VoIP Gateway ACOM516L-64 SIP GoIP ModemNegotiableMOQ: 1 Combo
-
Good Price for 2G M26 SK8-32 Ports 8 SIms 32 Voip Gateway Change IMEI Bulk SMS Call Center Router Sim BoxUS$ 620 - 629MOQ: 1 Piece


