

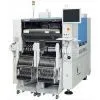
YAMAHA YTF80 SMTpart

Negotiable
MOQ: 1 Piece (Price negotiable depending on order volume and customization)
Key Specifications
Get Latest Price
Business Type:
Trading Company
Total Employees:
101 - 200 People
Main Markets:
North America, South America, Eastern Europe
Payment & Shipping
Payment Methods:
Port of Shipment:
China
Delivery Detail:
7 days
Related Products
| 12 | ||||||
| Close the front and the center safety cover. | ||||||
| 13 | ||||||
| Turn ON the servo switch. | ||||||
| 14 | ||||||
| Press | ||||||
| of the function keys. | ||||||
| . The screen returns to the <Machine adjustment menu> screen. | ||||||
| 1E3C-E-MMB01-A02-00 Page 1-39 1.4 Every-140-Hour Check (Once a Week) | ||||||
| 1.4.3 Cleaning the Temperature-Control-Unit Filters (Option) | ||||||
| 1 | ||||||
| Press the stop switch. | ||||||
| 2 | ||||||
| Residual operation is carried out for two minutes, and then the blowing fan comes to a stop. | ||||||
| 1D3C-045E | ||||||
| 3. Remove the filters c and d. | ||||||
| . Remove the filter c by pulling it out. | ||||||
| Name | ||||||
| c | ||||||
| Filter c (Pre-filter) | ||||||
| d | ||||||
| Filter d (Saran net) | ||||||
| 4. Clean the filters. | ||||||
| 1. Filter . | ||||||
| . | ||||||
| Rinse the filters. | ||||||
| . | ||||||
| After cleaning, dry it well. | ||||||
| 2. Filter . | ||||||
| . Clean it using such as a cleaner. | ||||||
| 5. Attach the filters c and d. | ||||||
| Page 1-40 1E3C-E-MMB01-A02-00 | ||||||
| 1.4.4 Cleaning the Printing Unit (Option) | ||||||
| 1.4 Every-140-Hour Check (Once a Week) | ||||||
| 1. Detach the printing unit. ( | ||||||
| Cartridge Head Manual) | ||||||
| Name | ||||||
| c | ||||||
| Maintenance jig | ||||||
| d | ||||||
| Cassette | ||||||
| 2. Set the printing unit to the maintenance jig. | ||||||
| . The printing unit should be set so that the cassette will face upward. | ||||||
| 3. Loosen both the screws mounting the cassette holder, and tilt the plates outward. | ||||||
| Name | ||||||
| c | ||||||
| Cassette holder | ||||||
| d | ||||||
| Plate | ||||||
| 1E4C-428P | ||||||
| 4. Open the cassette holder by turning it 180°, and remove it together with the holder from the printing unit. | ||||||
| . Take care not to open the cassette holder while solder remains in the cassette, or it will be pulled out. | ||||||
| 1E4C-429P | ||||||
| 1E3C-E-MMB01-A02-00 Page 1-41 | ||||||
| 1.4 Every-140-Hour Check (Once a Week) | ||||||
| 1E4C-452P | ||||||
| 1E4C-434P | ||||||
| 5. Attach the cover for maintenance (for storing the unit) to the printing unit. | ||||||
| . Attach it under the printing unit sliding it sideways. | ||||||
| Name | ||||||
| c | ||||||
| Cover | ||||||
| d | ||||||
| Plate | ||||||
| 6 | ||||||
| Unscrew both the screws mounting the plate, and detach it. | ||||||
| 7 | ||||||
| Remove the ring. | ||||||
| 8 | ||||||
| Using the cleaning jig, collect the solder in the unit. | ||||||
| . | ||||||
| Avoid using a metallic spatula. Otherwise, it may damage the printing unit. | ||||||
| . | ||||||
| Dispose of the solder collected in cleaning. | ||||||
| To the next page | ||||||
| Page 1-42 1E3C-E-MMB01-A02-00 1.4 Every-140-Hour Check (Once a Week) | ||||||
| 9. Detach the block in the printing unit upward, and, using the cleaning jig, collect the solder adhered to the block and that remaining in the unit. | ||||||
| . Avoid using a metallic spatula. Otherwise, it may damage the printing unit. | ||||||
| Name | ||||||
| cBlock |

Send Inquiry to This Supplier

* Email
Want the best price?
Post an RFQ now!
Business Type
Trading Company
Total Employees
101 - 200 People
Main Markets
North America, South America, Eastern Europe
Location
Baoji, Shaanxi, China
You May Also Like
-
 Professional Portable Teeth Whitening Led LightUS$ 1 - 280MOQ: 1 Set
 -
Multifunctional Dental Equipment Dental Care Teeth Whitening MachineNegotiableMOQ: 1 Unit
-
OraTek Power Tooth Stain Remover and Tooth WhitenerUS$ 1.8 - 3.99MOQ: 1 Unit
-
Tooth Whitening KitNegotiableMOQ: 1 Piece
-
Toothpick With HolderUS$ 0.06 - 0.1MOQ: 10 Cartons
-
Finger Teeth Whitening WipeUS$ 0.04 - 0.05MOQ: 1000 Pieces
-
Huge Dental Sonning Full Set Acrylic Denture TeethNegotiableMOQ: 1 Box
-
Luma Smile Tooth Polisher Electric Tooth PolisherUS$ 1.3 - 1.5MOQ: 1
-
Pink Oral Care Sponge Swab for Bed-Bound, Elderly, Disabled, Post-Operative, And Icu PatientsNegotiableMOQ: 1000 Packs
-
Portable Dental Oral Water Irrigators Dental Floss Water Flosser Pick for Teeth IrrigationUS$ 1 - 100000MOQ: 1 Piece

