

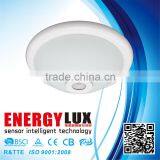
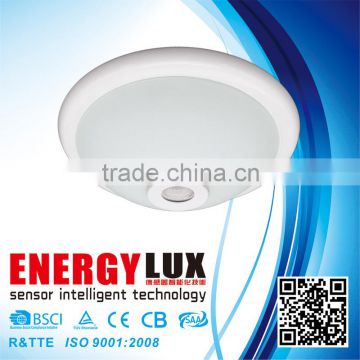
ES-PL01C LED Ceiling Lamp With Motion Sensor
Related Products
-
 ES-PL01A E27 2*40W PIR Sensor Ceiling LampUS$ 1 - 5.5MOQ: 1000 Pieces
 -
ES-ML05 PMMA COVER LED Ceiling Light With MV SensorUS$ 1 - 17MOQ: 500 Pieces
-
ES-ML04C Microwave Sensor Ceiling LightUS$ 1 - 18MOQ: 500 Pieces
-
ES-ML04B LED Panel Light With SensorUS$ 1 - 13MOQ: 1 Piece
-
ES-ML04A Surface Mount LED Panel LightUS$ 1 - 10MOQ: 1 Piece
1.Identify day and night automatically
2.Surface Celling Mount Installation
3.Material:Glass Cover or PC Cover with Iron base plate
Welcome to read ES-PL01C LED ceiling lamp with motion sensor !
This product is an energy-saving lamp, which can turn on when one comes and turn off when leaves. It can identify day and night automatically. It adopts infrared energy discharging detector, IC and SMD technology its performance is stable and reliable. When one enters the detection field and trigger it, the infrared sensor will work and make the lamp on. When leaves, the lamp will die out automatically.
SPECIFICATION:
| MODEL | ES-PL01C |
|
| DETECTION RANGE | Max 6M | |
| DETECTION ANGLE | 360° | |
| POWER SOURCE |
220-240V/AC |
|
| POWER FREQUENCY | 50/60HZ | |
| RATED LOAD | SMD,LED12W |
|
| TIME SETTING | 10sec-2min(adjustable) | |
| WORKING HUMIDITY | <93%RH | |
| WORK TEMPERATURE | -10°C~+40°C | |
| INSTALLING HEIGHT | 2m-4.5m |
FUNCTION:
1.It can identify day and nigh, and could choose the intensity of illumination what is in the working atmosphere by free. When turn the LUX knob to SUN symbol, it could be worked in any light, when turn to MOON symbol, it only could be worked in the night when the light is less than 3 LUX
2.Time Delay continues adding: after first inducting, when it receives the second induction signal again, the time delay will be re-clocking base on the first remainder time-delay (Set Time).
3.Adjustable Time Delay: the length of time delay could be set according to the customers’ requirement, the minimum time of this item is 10sec ± 3sec, the maximum is 2 min ± 30sec.
INSTALLATION:
-
Ø Switch off the power.
- Ø Unscrew the plastic screw nut and remove the glass lampshade, then cross the wire through wires hole according to the following connect-wire figure.
- Ø Enclose the incandescent bulbs or energy-saving lamps. Install the sensor lamp in the position where you need with inflated screws.
- Ø Fasten the lampshade, then electrifying and testing.
- CONNECTION-WIER SKETCH DIAGRAM
Connecting the power source into the ”N” , ”L” according to connection wire diagram when you install it.
Energylux, your smart home,your Eco-friends.
Welcome your any enquiry.
Skype ID: lena_lz / QQ ID:2837940943 / Facebook: ZI Lin

Send Inquiry to This Supplier

You May Also Like
-
SICK ICR845-2E1020 SICK Industrial Barcode Scanner for Logistics & AutomationNegotiableMOQ: 1 Piece
-
Sick WSE4S-3P3130H Order Number: 1052888 Product Family: W4S-3 Inox Hygiene Product Family: Photoelectric SensorsUS$ 100 - 200MOQ: 1 Piece
-
Pressure SensorNegotiableMOQ: 2000 Pieces
-
China NOx Sensor Nitrogen Oxygen Manufacturer Supply 12665215 12638377 12642310 12648630 12665216 12638378 For GMNegotiableMOQ: 1 Combo
-
20428461 20732304 20428462 Heavy Duty Truck Sensor Parts Fuel Tank Level Sensor For VOLVONegotiableMOQ: 1
-
King Pigeon Temperature Humidity Transducer THI100 Temperature Humidity Detector Wireless SensorUS$ 2 - 31MOQ: 5 Pieces
-
Ultrasonic Position Liquid Level Position SensorUS$ 200 - 700MOQ: 1 Piece
-
Crank Oil Seal for Toyota Auto Parts Oem 90311-95012US$ 1 - 10MOQ: 1 Piece
-
SHT10 Humidity & Temperature SensorUS$ 1 - 2MOQ: 5 Pieces
-
Wholesales & Retails HCA131A High Performance Dual Axes Tilt Sensor Switch Led Light With Tilt Switch From Shenzhen FactoryNegotiableMOQ: 1 Piece


