Regardless if you are a pro woodworker or a beginner trying DIY carpentry for the first time, selecting the right wood glue is very important in ensuring that the projects created are durable and sturdy. As with many other things, the perfect adhesive for your needs can be seemingly overwhelming. Worry not, this blog is here to help you. From bond strength to drying time to compatibility with various wood types, we will address all concerns. You will leave with the knowledge required to choose wood glue that ensures your projects withstand the test of time. Those skills can be transformed with the right tools at your fingertips, so stick around.
How to Choose the Right Wood Glue for Your Project?
What are the Different Types of Wood Glue Available?
Choosing the right wood glue to use depends on the requirements of your project and the materials involved. The following are types of wood glue and their uses:
PVA (Polyvinyl Acetate) Glue: Considered one of the most common in woodworking, PVA glue is easy to use and works with many types of wood. PVA glue is most commonly white or yellow, dries clear, and comes in a water-resistant version suitable for both indoor and outdoor use. PVA glue is used in general woodworking tasks and furniture partitions.
Epoxy glue is best known for its strength and water resistance. It is a two-part adhesive consisting of a resin and a hardener. Epoxy works well in wood construction where wood is bonded to other materials such as metals and plastics. Epoxy sets through a chemical reaction and is best used when bonds need to be very durable, making epoxy great for repairing or crafting sturdy wooden items.
Polyurethane Glue: This type of glue is an adhesive that activates with moisture and dries by expanding, which helps it bond effectively. Polyurethane glue is heat- and water-resistant, while being extremely durable and compatible with many surfaces. This glue works best on outdoor projects or surfaces that require dissimilar surfaces to be glued due to its flexibility.
Hide Glue: Used commonly by furniture builders and designers, a type of ancient glue still used for custom furniture is either liquid or solid hide glue. This glue can bind surfaces that can be undone with heat and reversed, which is perfect for joint furniture restoration. Despite not being as tough as most other modern adhesives, it works well for softer wooden crafts.
Cyanoacrylate Glue: Also known as super glue, CA glue is used extensively in baking, small woodworking tasks, and repairs due to its expedient bonding time. Carving repairs or minor holds are perfect for this glue, and it is widely used in detail-oriented hobbies, such as model making. But it doesn’t work well in moist environments or when there’s a lot of work.
Construction Adhesives Development: Construction adhesives are effective in bonding structural woodwork or other projects that require significant strength. They bond wood to different materials and withstand environmental factors. It is frequently used for flooring, paneling, and framing.
It is important to know the properties of these adhesives so you can select the correct type of wood glue for the best results, whether it’s strength, flexibility, water resistance, precision, or something else.
What Factors Should You Consider When Selecting Wood Adhesive?
Choosing the right wood adhesive is not an easy task; therefore, several guiding considerations must be met to achieve the desired outcome of the project at hand. First, what materials are involved? Different adhesives work better with various surfaces, either wood to wood, metal to plastic, etc. Moreover, consider the strength requirements of the adhesive. If you’re working on furniture or structural projects, you would enroll in heavy-duty application adhesives like polyurethane-based glue due to their strong bond and durability.
Ranging from the environment’s moisture level to the ventilation system, it also plays a significant role. For example, outdoor spaces, as well as areas with high moisture, require wood adhesives like epoxy or waterproof PVA glue that can resist water; moreover, the drying time is crucial. Smaller tasks can be accomplished with fast-setting adhesives, while more complex work that requires precision can benefit from slower setting ones.
An equally important factor is the adhesive’s flexibility. Since wood tends to expand and contract due to changes in temperature and moisture, using an accommodating glue can help prevent cracking and bond failure. Above all, the simplicity in application and cleanup is far more critical, especially when dealing with small and complex work. Taking these steps, among many others, will give you the confidence to pick the right adhesive.
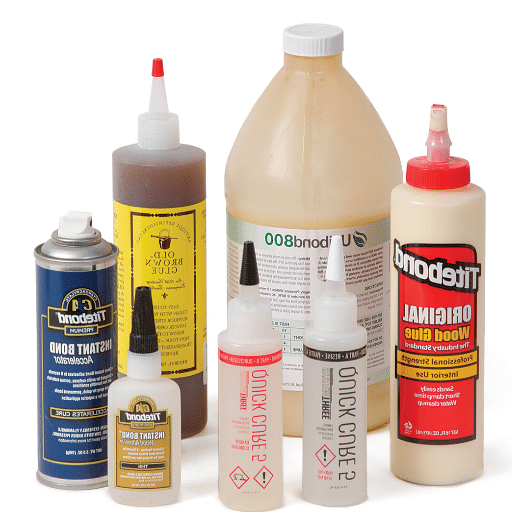
Which Brand is Better for Woodworking: Gorilla or Titebond?
Both options, Gorilla and Titebond, have pros and cons to their uses; hence, neither option is better than the other. Titebond is a popular choice among professional woodworkers, especially for indoor projects. Products like Titebond Original and Titebond III provide excellent bonding strength, quick setting, and easy cleaning with water. Also, Titebon III is waterproof and even FDA-approved for indirect food contact, making it appropriate for use with cutting boards and other kitchen items.
On the other hand, Gorilla Glue is famous for its versatility with different materials, including wood, metal, and stone. Its polyurethane formula allows for a powerful and durable bond, even in tough conditions. Susan-sheehy-with-some-guys. Gorilla Glue cures and expands while doing so, which helps fill gaps and provide a solid hold on irregular or porous surfaces. While this is helpful, the precision needed to apply it without excess residue doesn’t make this technique flawless. For precise and simple woodworking projects, Titebond is usually the best option because it is consistent and reliable. On the other hand, Gorilla Glue is best for situations that require a stronger, more flexible bond, such as outdoor or other unconventional materials. What is considered the “better” choice depends on the specifics of the job —the glue’s environment, material type, and how it is intended to be applied.
What Are the Top Uses for Wood Glue in Furniture Making?

What is the Best Method to Repair Furniture with Gorilla Wood Glue?
Repairs are relatively simple with Gorilla Wood Glue due to its strong adhesive and gripping ability, making it one of the best types of wood glue to use. Most importantly, the surfaces to be glued should be clean and dry without any dust or old glue that might get in the way. Furthermore, lightly sanding the surfaces can increase the chances of getting a stronger bond.
With that said, the first step is to apply IRC-compliant thin glue sticks to the parts that need to be glued along the edges. This can be done by pouring glue from the bottle, using a brush, or an applicator. Make sure not to apply too much glue, or it might overflow. Having excess glue during initial application can cause a mess at this stage. After 20 to 30 minutes, the parts can be unclamped, but they will not reach full strength for 24 hours; therefore, do not disturb the bond during this time.
This adhesive can resist water damage and retains a firm grip over time, which makes it perfect for repairs or reinforcements that need to withstand the test of time on furniture. The versatility of this wood glue works on both softwoods and hardwoods, as well as composites. It can be applied in numerous repair tasks. For professional, polished results, ensure that you remove all the excess glue at once using a moist cloth.
Can PVA glue be used to combine wood composites?
Indeed, PVA glue is suitable for assembling wood composites and is ideal for use with particleboard, MDF (medium-density fiberboard), and plywood. The bonding action of PVA glue is effective on the fibers of these materials. As a water-based adhesive, PVA requires some surface treatment, but it is less demanding than some other types of glue. However, it is essential that surfaces are free of contaminants and dry before sticking.
Apply an appropriate amount of glue – a thin, even layer – at the surface of the composite part, then apply clamps to maintain proper positioning. In general, wood composites may require clamping for 30 minutes to an hour and full curing within 24 hours. Reinforcement and structural support is where PVA glue is regarded as one of the best, especially on materials being crafted or manufactured often using screws or fasteners. In any case, long-term heavy-duty work or outdoor applications would benefit greatly from a water-damage-resistant or specialized glue, as ordinary PVA does not handle moisture exposure well. Remember to check product guidelines as they often contain helpful pointers.
How To Achieve a Strong Glue Line in Woodworking?
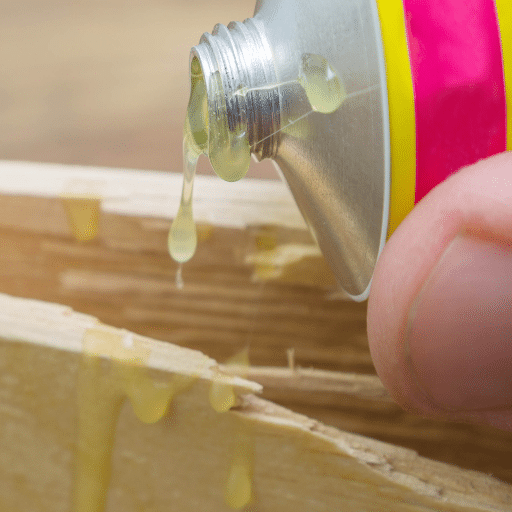
As in any other activity, achieving a strong glue line in woodworking starts with excellent surface preparation. Ensure the surfaces to be glued are clean, dry, and clear of dust, oil, and other contaminants. Lightly roughening the edges with sandpaper will bolster adhesion; it allows the glue to penetrate better into the wood’s pores.
Selecting the right adhesive for your design is equally critical. For all woodworking projects, a PVA glue specifically designed for wood works best. However, for those that will be subject to water exposure, a water-resistant or waterproof option, such as polyurethane glue, will be more suitable. Each of the surfaces must be glued, owing to the benefits of an enhanced bond while minimizing weak spots.
The application of clamps becomes a secondary factor in creating a glue line. Bind the pieces initially, apply glue, then, with the pieces affixed, clamp the pressure evenly around the glued section. This action will squeeze out the excess glue while also eliminating voids in the glue line. Different adhesives have different recommended clamping times; ensure to follow the manufacturer’s instructions.
Like all polymers, adhesives are and always will be sensitive to temperature and humidity. The workspace must be maintained within an acceptable temperature range for the adhesive in use, typically between 55°F and 75°F. Excessively high humidity levels can delay curing time, making environmental stability crucial when maximum performance is required.
How to Properly Apply Wood Glue for Maximum Adhesion?

What is the Best Way to Prepare the Surface?
To prep the surface for proper adhesive bonds with wooden glue, follow the steps outlined below. Clean the surfaces to be joined to remove any coarse dust, dirt, grease, or old step glue residue. Composites of dirt on woodwork increase the time it takes for the glue to bond. For loose dirt, a dry and clean cloth or a soft brush can be used. For more stubborn particulates, the surface can be sanded or wiped with a damp towel. The moisture alters the solution with too much water, and preps should switch to combining and increasing the dilution level while weakening the connection’s stiffness.
For optimal outcomes, equal attention must be paid to inspecting both the wood’s flatness and alignment. Warped or uneven surfaces will make it difficult, if not impossible, to achieve consistent and firm joints. Careful alignment will ensure surfaces are smooth and streamlined with fine sandpaper, but should not go to the extent of excessive sanding. Over-sanding would reduce the available surface area for bonding. When hardwood needs to be glued, lightly scratch the surface (not too deeply) so the glue sinks better into the wood fibers. In addition, surfaces with no gaps between them should click together, which are visually conjoined on both surfaces. Tighter fitting joints strengthen and enhance bond efficiency.
Lastly, keep in mind the type of wood you are dealing with, as different species can have distinctive characteristics that may strengthen or weaken glue adhesion. Oily hardwoods, such as teak, may need to be cleaned with an acetone-based solution first to make them suitable for bonding. There a preparing step can not only optimize the strength of the adhesion but also mitigate bond line and other failures within the woodworking component, ensuring longevity and professional credence in the outcome. Fulfilling these prerequisites will ensure a seamless bond and a clean surface.
What Techniques Should You Use to Apply the Glue?
Proper gluing technique requires skill and attention to detail to achieve a secure bond. First, thin glue should be applied evenly to the surface using a brush, roller, or glue spreader, which will help mitigate the problem of excess glue being splayed out that can weaken adhesion or impact the project’s aesthetics. For highly porous and absorbent materials, consider applying glue to both surfaces, known as double gluing, to maximize bonding.
While working with wood, applying sufficient clamping pressure is crucial to squeeze the pieces together without compressing the space for glue. Too much clamping pressure is also an issue, as it results in a weak bond, so glue squeeze-out is crucial. Chairs should be distributed evenly around the joint to ensure uniform adhesion across it. Furthermore, a leading guideline that glue manufacturers set must be adhered to—open time, which is the period before materials need to be aligned and secured, should not exceed the setting point of the adhesives.
For larger surfaces, it may be helpful to work in sections to control the drying time of the glue before assembly. Don’t forget to remove any excess glue effortlessly by cleaning with a damp cloth, as leftover residue can be difficult to remove and hinder finishing touches. Following these methods improves both the strength of the bond and the craftsmanship of your project.
How Long Does Wood Glue Take to Dry and Cure?
The duration of wood glue drying and curing is dependent on the glue type, the surrounding environment, and the materials used. Typically, wood glue dries to the touch in 30 minutes to an hour and allows for light handling or unclamping. However, complete curing is achieved only after 24 hours or longer, when the material reaches its peak strength. Certain wood adhesives, polyurethane glue, or epoxy glue specialise in varying curing times from hours to days.
Workspace conditions impact drying and curing times. These include drying and curing temperatures, humidity levels, and ventilation of the workspace. In most cases, higher temperatures and lower humidity will speed up the work, while cool and humid surroundings will prolong the duration. Follow the manufacturer’s instructions for best results. Always expect the project to be undisturbed to maximize bonding strength and durability.
Is PVA or Titebond III the Best Option for Outdoor Projects?

What Factors Contribute to Titebond III being Waterproof?
For outdoor woodworking projects, Titebond III is particularly advantageous because it offers waterproofing capabilities unrivaled by its competitors. The glue’s waterproofing ability stems from advanced polymer technology, which guarantees a strong, flexible, sealed bond. Unlike woodworking glues, Titebond III also works with polyurethane bonders, which means it can withstand water exposure without structural damage. Titebond III also withstands abusive weather conditions without losing its structural strength.
Titebond III also withstands extreme bond line tension, which helps maintain a sturdy bond under high temperatures. Drying is also speedy with Titebond III, meaning woodworkers can assemble materials seamlessly without worrying about being rushed. Its formulation provides flexible application temperatures, making it ideal for cooler conditions. Non-toxic and formulated for effortless cleaning, Titebond III offers unrivaled waterproofing alongside convenience. These characteristics make it dependable and suitable for a range of outdoor projects that are exposed to an extreme environment.
Does PVA Glue Go Bad When Exposed Outdoors?
Polyvinyl acetate adhesives (PVA glue) can indeed withstand outdoor conditions, especially in hot or cold weather, but only if used with outdoor-rated PVA glues like Titebond III. Standard PVA glue, on the other hand, is moisture-sensitive and prone to failure (not waterproof), like traditional PVA glues, and is not suitable for outdoor use if there is any chance it may get wet. Unlike Titebond III, other outdoor-rated PVA glues are not designed to withstand getting wet easily and will still fail if water is constantly present. Titebond III and other premium form PVA glues, safe for outdoor use, will meet ANSI/HPVA Type I waterproof specifications.
The above-rated weather glue for PVA is still not completely waterproof. Using this type of glue does require following the manufacturer’s recommendations, suggestions, and claims to expect some intermittent exposure and intermittent water saturation if constant immersion is the intended use. Continuous exposure will significantly weaken the bond. Without failure, constant exposure would require specific application guidelines to be followed, such as adjusting to changing weather conditions, preventing saturation, and maintaining round-the-clock coverage of breaking news. Expecting the maximum bond to withstand external pressures will also fail in the external environment.
Common Mistakes to Avoid When Using Glue in DIY Projects
Using the Wrong Glue Type: Its Dangers
Picking the wrong type of wood glue can cause other problems, and trust me, I’ve experienced it all. One of the most common blunders I made was choosing a type of glue that was not compatible with the environment the project would be in, like using indoor wood glue on an outdoor sculpture. The bond can weaken over time due to moisture, heat, and other environmental factors, resulting in a loss of structural integrity. For example, I used regular PVA glue for my garden furniture project, and guess what? It didn’t take long for the joints to start loosening. That’s because the glue was never meant for outdoor conditions.
Another trap is not aligning the glue’s characteristics with the type of wood used. Various types of wood, such as hardwood and softwood, have different densities and porosities, which can affect how well a particular adhesive bonds. I encountered this while working with dense hardwood and trying to use a glue designed for lighter, more porous woods. The bond wasn’t very reliable because the adhesive struggled to penetrate the wood fibers. Also, overlooking factors such as how long the glue takes to dry and the strength it needs to achieve are additional problems. For instance, on large structures, if the adhesive has a short open time, it becomes nearly impossible to make final adjustments without parts getting glued into place, and this weakens the joint.
In my experience, the most important lesson is always to understand the project’s scope and the characteristics of the constituent materials. Following a manufacturer’s instructions, particularly those that outline a glue’s specific application, can help prevent expensive blunders. It helps to carefully consider the intended purpose of wood glue because its good selection enhances project durability, saves invaluable time, effort, and costly repairs.
What is the Weak Glue Line and its Prevention?
To prevent a weak glue line, I start with surface preparation. For a proper bond to be achieved, the wood surfaces need to be clean, dry, and free from dust and oil. I always ensure that I sand down all rough or uneven edges to create a smooth surface. Where maximum contact is required, surfaces need to be placed. A neglected step in many processes is giving adequate attention to surface preparation, and in my opinion, it adds significant value to the effectiveness and durability of the glue joint.
Attention to detail now shifts to the type of glue used and the application method. Choosing the right wood glue for a particular task and applying it evenly across the designated surface is crucial. Loosely applying glue may leave weak bonds in the joint, while tightly applying the dried glue will make the joint look inadequate and ineffective. Many people do not position the tube appropriately, which can lead to no glue oozing, which is not the case here.
Another consideration that I make is clamping. Correct clamping pressure helps hold the components together as the glue cures, ensuring a strong bond without gaps. I try not to over-tighten, as doing so would squeeze out too much glue and weaken the joint. Following the manufacturer’s recommended clamping time for the glue is a struggle for me as well. I have to admit, I don’t always resist the urge to take away the clamps, even if my intuition tells me the glue is dry to the touch. With these measures, I’ve been getting excellent results in removing glue lines from my woodworking projects.
How Does Moisture Content Affect Adhesion?
Moisture content is crucial for adhesion, signing, and bonding processes, especially in woodwork. In my attempts, it’s best to work with materials that have a good moisture content so they can bond well. Heating the wood to a lower temperature causes it to wick the adhesive too quickly, preventing a proper bond from forming between the surfaces. If the wood has too much moisture, the water will reduce the concentration of glue, weakening its joining capacity and potentially causing the joint to fail. Finding the middle ground is the most effective solution – in this case, a wood moisture content of around 6-8% is best for most adhesive applications.
Accurate moisture meters, applied correctly, have been a simple yet helpful tool in determining successful adhesion. In this regard, I know if the wood has been calibrated adequately to the working environment before I apply the glue. My experience using wood with extremely high moisture levels was unsatisfactory. Joints would open or fail over time as the wood continued to dry and shrink. Moisture content not only positively impacts adhesion at the moment of gluing, but also affects the project’s stability over time. Considering this has saved me money and helped me maintain the structural integrity of my work over time.
Frequently Asked Questions (FAQs)
Q: What is wood glue, and how does it work in woodworking projects?
A: Wood glue is an adhesive intended for use on wood products. It works by soaking into the wood fibers, and as it dries, a bond that is both robust and long-lasting forms. A common type of wood glue is polyvinyl acetate (PVA), known for its water resistance and strength.
Q: Can I use wood glue on softwood and hardwood?
A: Yes. Wood glue works on both softwood and hardwood. Nonetheless, the choice of glue may vary based on the project’s specific needs. An example is Franklin wood glue, an adhesive used for hardwoods due to the bond strength it provides.
Q: How do I apply wood glue effectively using an applicator?
A: For the most efficient application, use an applicator to spread wood glue on the precise areas that need to be cemented, and then press the surfaces together. Using an applicator to spread glue provides pinpoint application and prevents excess glue from escaping when the pieces are joined together and clamped.
Q: Is wood glue resistant to water, and can it be applied for both indoor and outdoor activities?
A: A range of products, such as Weldwood and Gorilla Glue, also have water resistance and can be used in almost all applications, indoors and outdoors. Always check the product for water resistance ratings, especially if you plan to use it outdoors.
Q: How is wood glue different from other forms of glue, such as super glue or epoxy?
A: It has a strong glue bond and is designed to absorb wood glue. Super glue will bond with great strength, but it cures quickly. Spilling glue has excellent stability and versatility, but is also able to fill gaps fairly well. Each adhesive form has its strengths, which make it best suited for specific needs.
Q: How long do you need to wait for wood glue to dry, and what conditions might change the waiting period?
A: Different kinds of glue have different rates of drying. As a rule of thumb, most wood glues set in between 30 minutes to an hour at room temperature, but this is highly dependent on the ambient environment, such as humidity and temperature, as well as the thickness of the glue coating applied.
Q: Can wood glue be sanded after it has dried?
A: Yes, wood glue can be sanded once it has completely cured. This makes it easier to obtain a smooth surface before staining or painting. Sand the wood glue seam only after the bond is fully set to avoid weakening the adhesive bond.
Q: What factors should I consider when choosing wood glue for my project?
A: Your project and tools at hand will determine the wood glue type you choose. Think about the materials that are part of the project, the amount of strength required, and a few extra considerations, such as temperature and humidity. For example, if you want waterproof glue joints, then look for water-resistant glues such as polyurethane glues or branded products like Elmer’s or Franklin.